Low-Fidelity Prototyping: Think, Test and Learn Before You Build
Low-fidelity prototypes are simple representations of a product idea created to explore concepts before investing in detailed design or development.
They are deliberately incomplete.
A low-fidelity prototype might be a sketch on paper, a storyboard showing how someone experiences a product, or a sequence of cards representing the steps in an interaction.
Their value comes precisely from their simplicity. Because they are quick and inexpensive to create, teams can explore multiple solutions, discard weak ideas and make changes without becoming overly attached to a particular design.
Common low-fidelity prototyping techniques include:
- Sketching
- Storyboarding
- Paper and card-based prototypes
Sketching
 Sketching is one of the fastest ways to make an idea tangible.
A sketch might represent a screen, a user journey, a feature or an entire product concept. It does not need to be visually polished. Its purpose is to communicate an idea clearly enough for people to discuss and challenge it.
Sketching is particularly useful during early ideation because teams can quickly generate several alternative solutions.
Rather than asking:
“How should we perfect this design?”
The team can ask:
“What are the different ways we could solve this problem?”
This encourages exploration before commitment.
Storyboarding
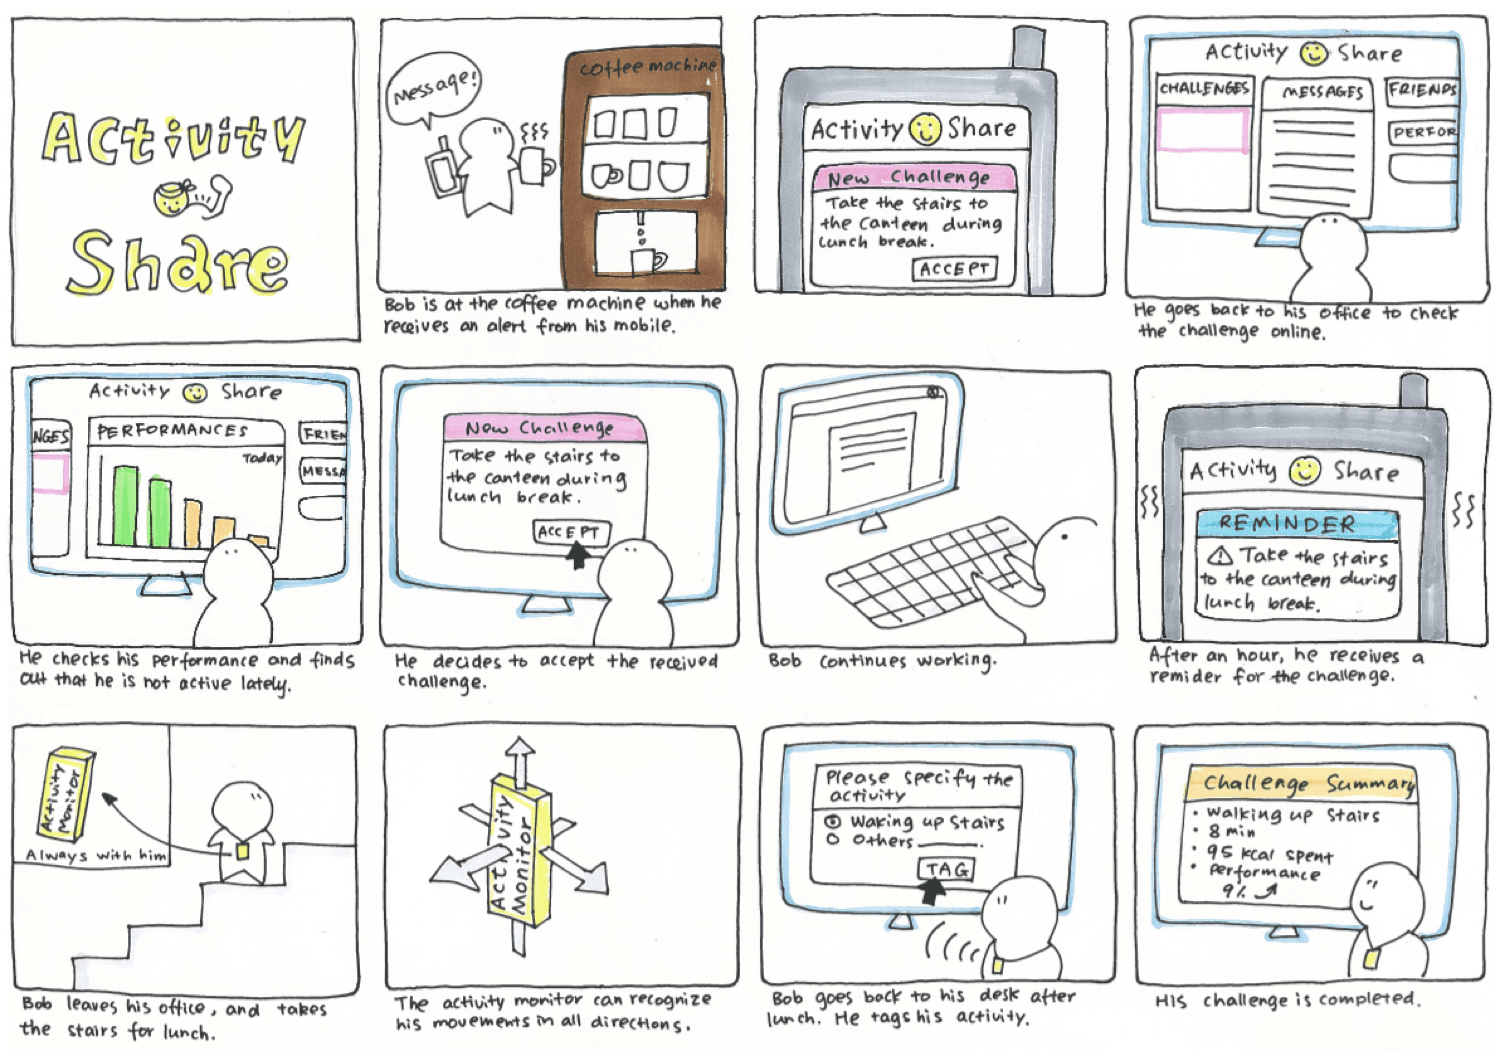
Storyboards place a product or service within the context of a user’s experience.
Instead of focusing only on what appears on a screen, a storyboard shows what happens before, during and after someone interacts with a product.
For example, a storyboard might show:
- The situation that creates a user’s need
- The moment they encounter the product
- How they interact with it
- What happens as a result
- How the experience affects their wider journey
This makes storyboarding particularly valuable for understanding the context around a product.
A perfectly designed interface may still fail if it does not fit naturally into the user’s behaviour, environment or existing workflow.
Storyboards help teams explore that bigger picture.
Paper and Card-Based Prototypes
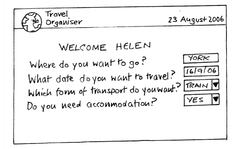
Paper and card-based prototypes allow teams to simulate an interactive experience without writing code.
Individual screens, components or steps can be represented on separate pieces of paper or cards. As the user makes a choice, the researcher presents the next appropriate screen.
This allows teams to observe how users move through a proposed experience.
They can help answer questions such as:
- Do users understand where to begin?
- Can they find the information they need?
- Is the sequence of steps logical?
- Where do they hesitate?
- What do they expect to happen next?
Because the prototype is easy to change, teams can quickly experiment with different flows and structures.
Low Fidelity Does Not Mean Low Value
There is sometimes a temptation to create highly polished prototypes because they feel more professional.
But greater visual fidelity does not necessarily produce better learning.
In the early stages of discovery, detailed designs can actually create problems. Teams may become emotionally invested in the solution, stakeholders may focus on colours and visual details rather than the underlying concept, and users may assume that important product decisions have already been made.
A rough prototype sends a different message:
This is an idea. It can still change.
That makes it particularly valuable for early learning.
Connecting Prototypes to Continuous Discovery
In continuous discovery, prototypes are not simply previews of products that teams have already decided to build.
They are tools for testing assumptions.
Imagine that a team believes customers need a new dashboard.
Instead of designing and building the entire dashboard, the team could sketch several approaches and present them to users.
The team might discover that users do not actually need another dashboard at all. Perhaps the underlying opportunity is better addressed through an alert, a report or an automated action.
This is why exploring multiple solutions matters.
The process becomes:
Opportunity → Multiple Solutions → Assumptions → Prototype → Test → Learn
The purpose of the prototype is not to prove that the team’s preferred idea is correct.
It is to generate evidence that helps the team decide what to do next.
Choosing the Right Level of Fidelity
The right prototype depends on what you need to learn.
Use a sketch when you want to explore alternative concepts.
Use a storyboard when context and the wider customer journey matter.
Use a paper prototype when you want to explore navigation or interaction sequences.
Move towards higher fidelity when you need to test details that cannot realistically be evaluated with simpler prototypes.
The guiding principle is straightforward:
Use the least amount of fidelity necessary to answer the question you are asking.
Tools for Low-Fidelity Prototyping
You do not need specialist software to create a useful low-fidelity prototype.
Pen and paper may be the fastest option.
For digital collaboration and more structured prototypes, modern teams also use tools such as Figma and FigJam for interface concepts and collaborative sketching, Miro for visual collaboration and storyboarding, and Axure for more complex interactive prototypes.
The tool matters less than the learning objective.
A sophisticated prototype created with advanced software is not automatically more valuable than five sketches created in ten minutes.
The best prototype is the one that helps the team learn quickly enough to make a better product decision.
Start Rough, Learn Fast
Low-fidelity prototyping gives teams permission to explore.
It allows ideas to remain flexible while uncertainty is still high and makes it inexpensive to discover that a solution does not work.
This is one of the most valuable habits in product development: increase investment as evidence increases.
Start with the opportunity. Explore multiple solutions. Identify what needs to be true. Then create the simplest representation that allows you to test those assumptions.
Because the objective is not to build the prototype.
The objective is to learn before you build the product.
Resources:
Usability.com/Prototyping – includes an excellent graph by Tracy Lepore, visually showing the evolution from sketch to design.
Lo-Fi vs Hi-Fi Prototyping: How Real Does the Real Thing Have to Be? by Florian N. Egger on telenovo.com.
High-Fidelity vs. Low-Fidelity prototyping in Web Design and App Development – by Kim Doleatto on http://www.atlargeinc.com/
Tools:
UX Recorder – Good for mobile user testing on iOS
Invision – Free design prototyping tool
Marvel App – Free version – prototyping tool for all types of devices.
 Data With Purpose
Leave a comment